Applications
What is an Application?
An Application is software that runs on a Node to perform a specific function. Applications can have multiple versions, allowing users to select, update, and manage different releases as needed. They can range from simple utilities (such as reading peripheral data) to complex AI models handling real-time processing and decision-making.
Applications in make87 are designed to integrate seamlessly with the platform, ensuring easy deployment, execution, and lifecycle management.
Creating Applications from Code Repositories
Any existing code repository can become a make87 application by adding a single file: MAKE87.yml. This manifest file is the only mandatory requirement to make your code compatible with the make87 platform.
Whether you're creating a new application or importing an existing codebase, the process is simple:
- Add a
MAKE87.ymlmanifest file to your repository root - Configure the basic application settings in the manifest
- Your code is now ready to be built and deployed on make87
The manifest defines how your application should be built, what resources it needs, and how it should run. At its simplest level, this is all that's needed to transform any code repository into a deployable make87 application.
For complete details on configuring the manifest, see the MAKE87.yml Manifest Reference.
For information on how applications communicate with each other, see Multi-Protocol Communication.
Application Lifecycle
The application lifecycle is the process of creating, building, and deploying applications on the make87 platform. This guide provides an overview of the application lifecycle, including the different stages and best practices for each stage.
graph TD
    A[<b>Creation</b><br>Creating a new application using the make87 UI]
    B[<b>Development</b><br>Writing and testing the application code]
    C[<b>Building</b><br>Creating a release version of the application]
    D[<b>Deployment</b><br>Deploying the application to a node]
    E[<b>Enhancement</b><br>Updating the application with new features or bug fixes]
    A --> B
    B --> C
    C --> D
    D --> E
    E --> B
Creation
Every application is backed by a GitHub repository for source code management. When you create an application, you can decide if you want to create a new repository or import an existing one. You can also choose to create a new repository from a template. This is useful if you want to start with a specific application structure or set of dependencies.
Every application gets an AI generated icon which can be re-generated if it's not to your liking.
Development
The development stage is where you write and test your application code. You can use your local IDE or use a web IDE to write and test your code. All code changes need to be committed to the associated GitHub repository.
Test Deployment
Once you have written your code, you can deploy it to a node for testing. This is done by deploying a development version, which effectively is any branch in your GitHub repository. For most applications, there is a main development version available from the start, and you can create additional branches as needed.
When deploying a development version, you can choose from different run modes. default uses the Application's dev_build kit. Other run modes are available if an application uses build_additions in its MAKE87.yml manifest. Common build additions are SSH access, a web-based IDE, or a remote debugger.
Select a dev version and a run mode.
Building
Once you have tested your application and are ready to deploy it, you can create a release version of the application. Every release version is based off a dev version, which is any branch of your GitHub repository, and receives a semantic version. This is important so users can understand if a new version is a major update, a minor update, or a patch. make87 will try to detect breaking changes and propose the correct next version, but it is up to the developer to decide what version number they eventually want to assign.
Each release version is built using the Build Kit specified in the MAKE87.yml file. The resulting image is stored
in make87's container registry for easy deployments.
Deployment
Once you have built your application, you can deploy it to a node. This is done by selecting the release version and choosing the node you want to deploy it to. When you deploy an application, the release image is being downloaded to the node which can take a few seconds to minutes depending on the size of the image and the connectivity of the node. If you decide to deploy an application a second time on the same node, make87 will use the locally cached image and start the application immediately.
You can stop a deployed application at any time, and start it again later.
Add an application to a node and deploy it
Enhancement
Once you have deployed your application, you can enhance it with new features or bug fixes. This is usually done by just
making committing new changes to a branch (e.g., main) and either deploying the development version or creating a new release version.
Code Access & Development Versions
For applications that users own or have edit access to:
- The source code can be viewed from the Application Detail View.
- Users can select any repository branch as a Development Version in the System Designer.
- Development versions can be deployed live on a target node for debugging and iteration.
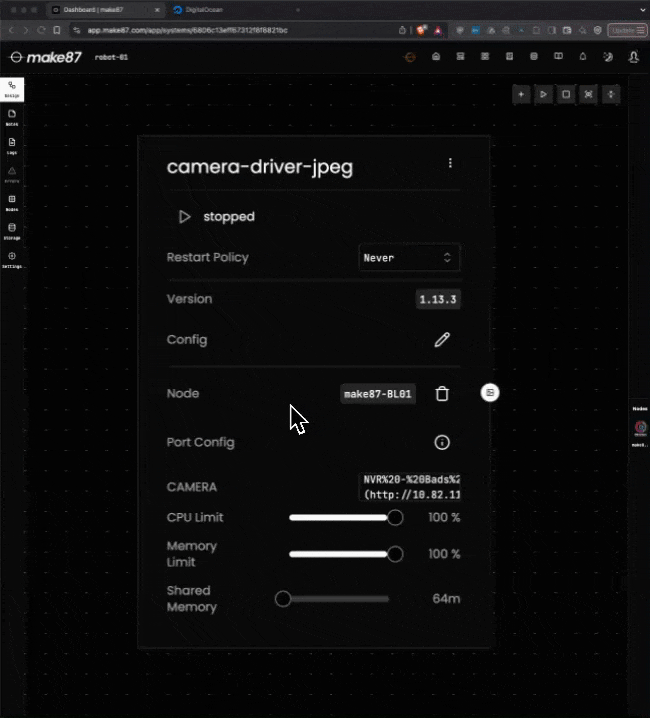
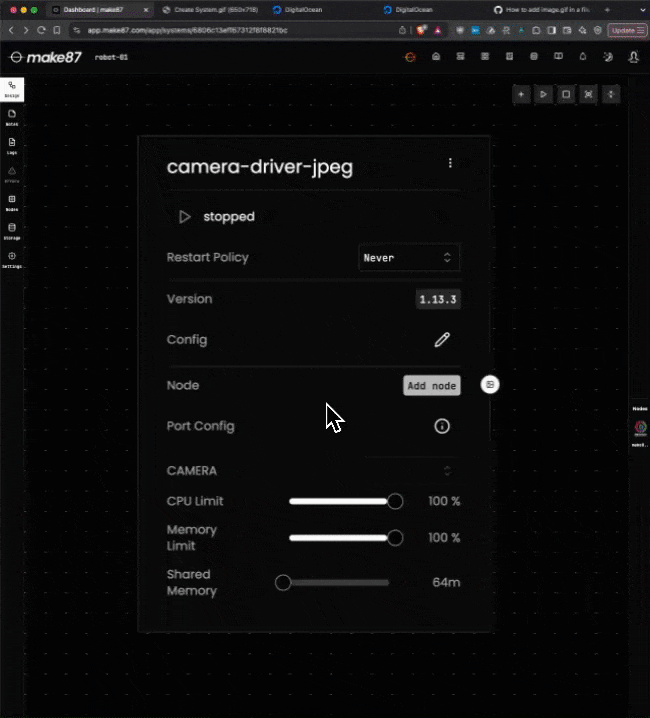
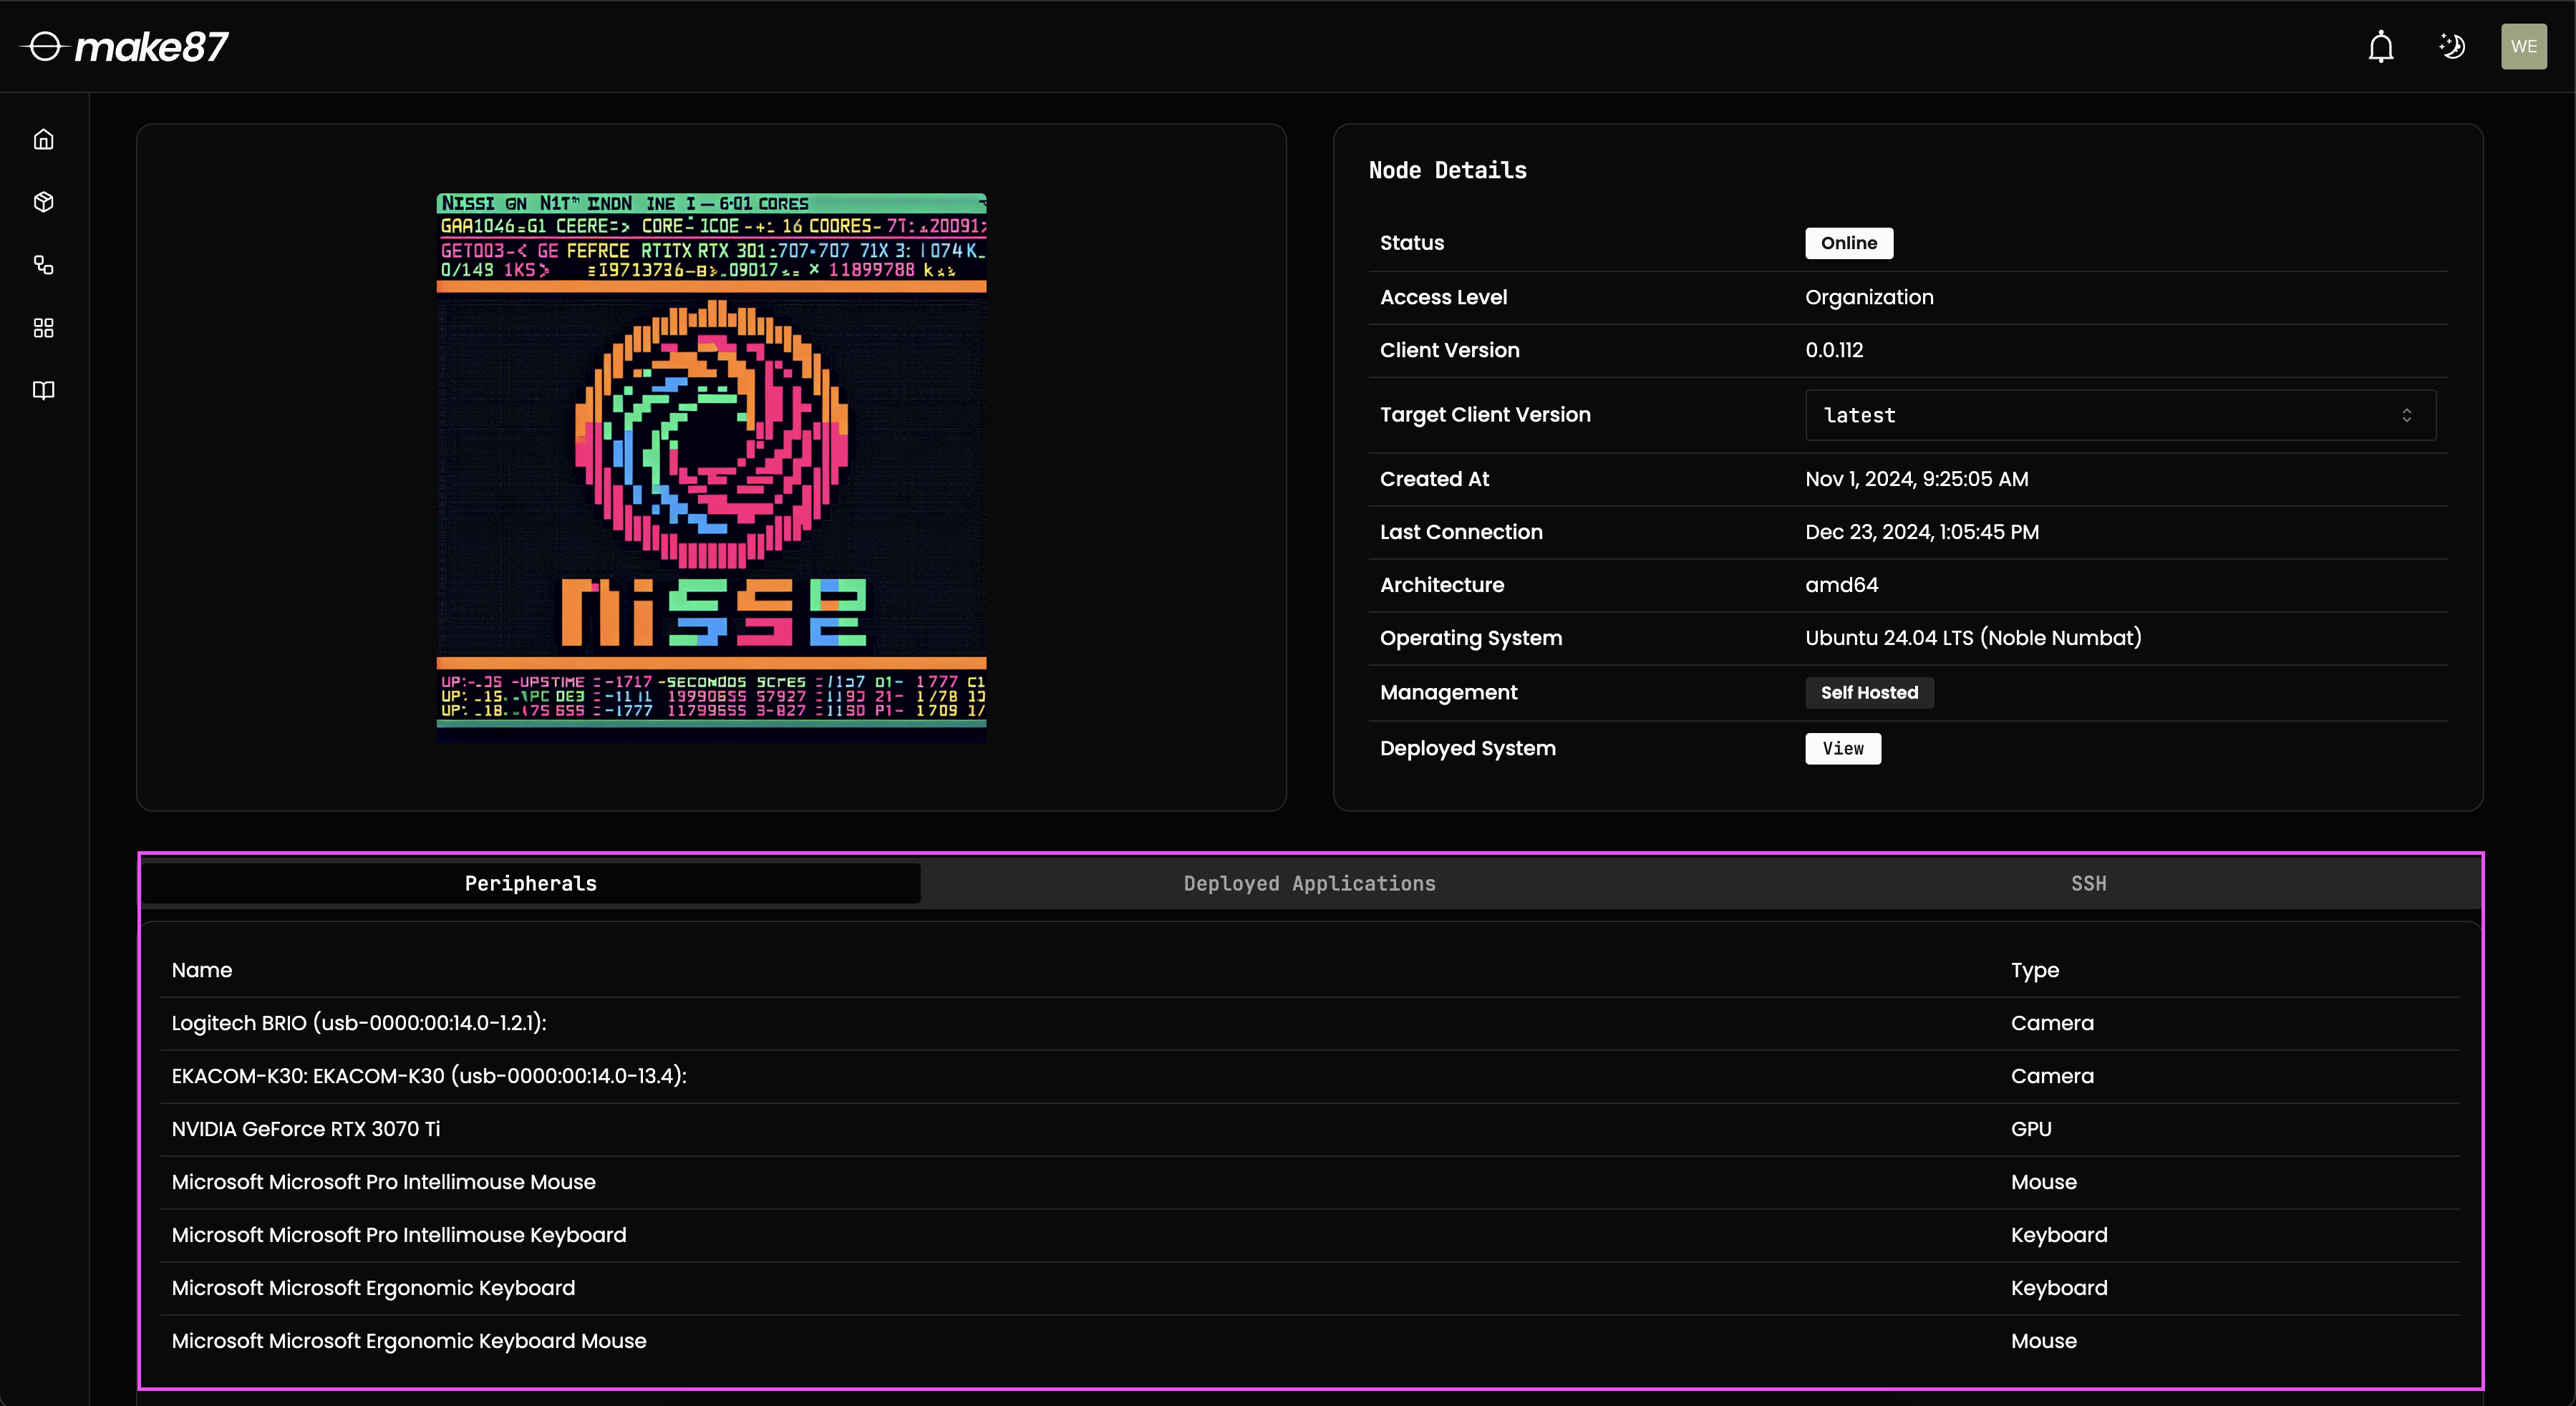
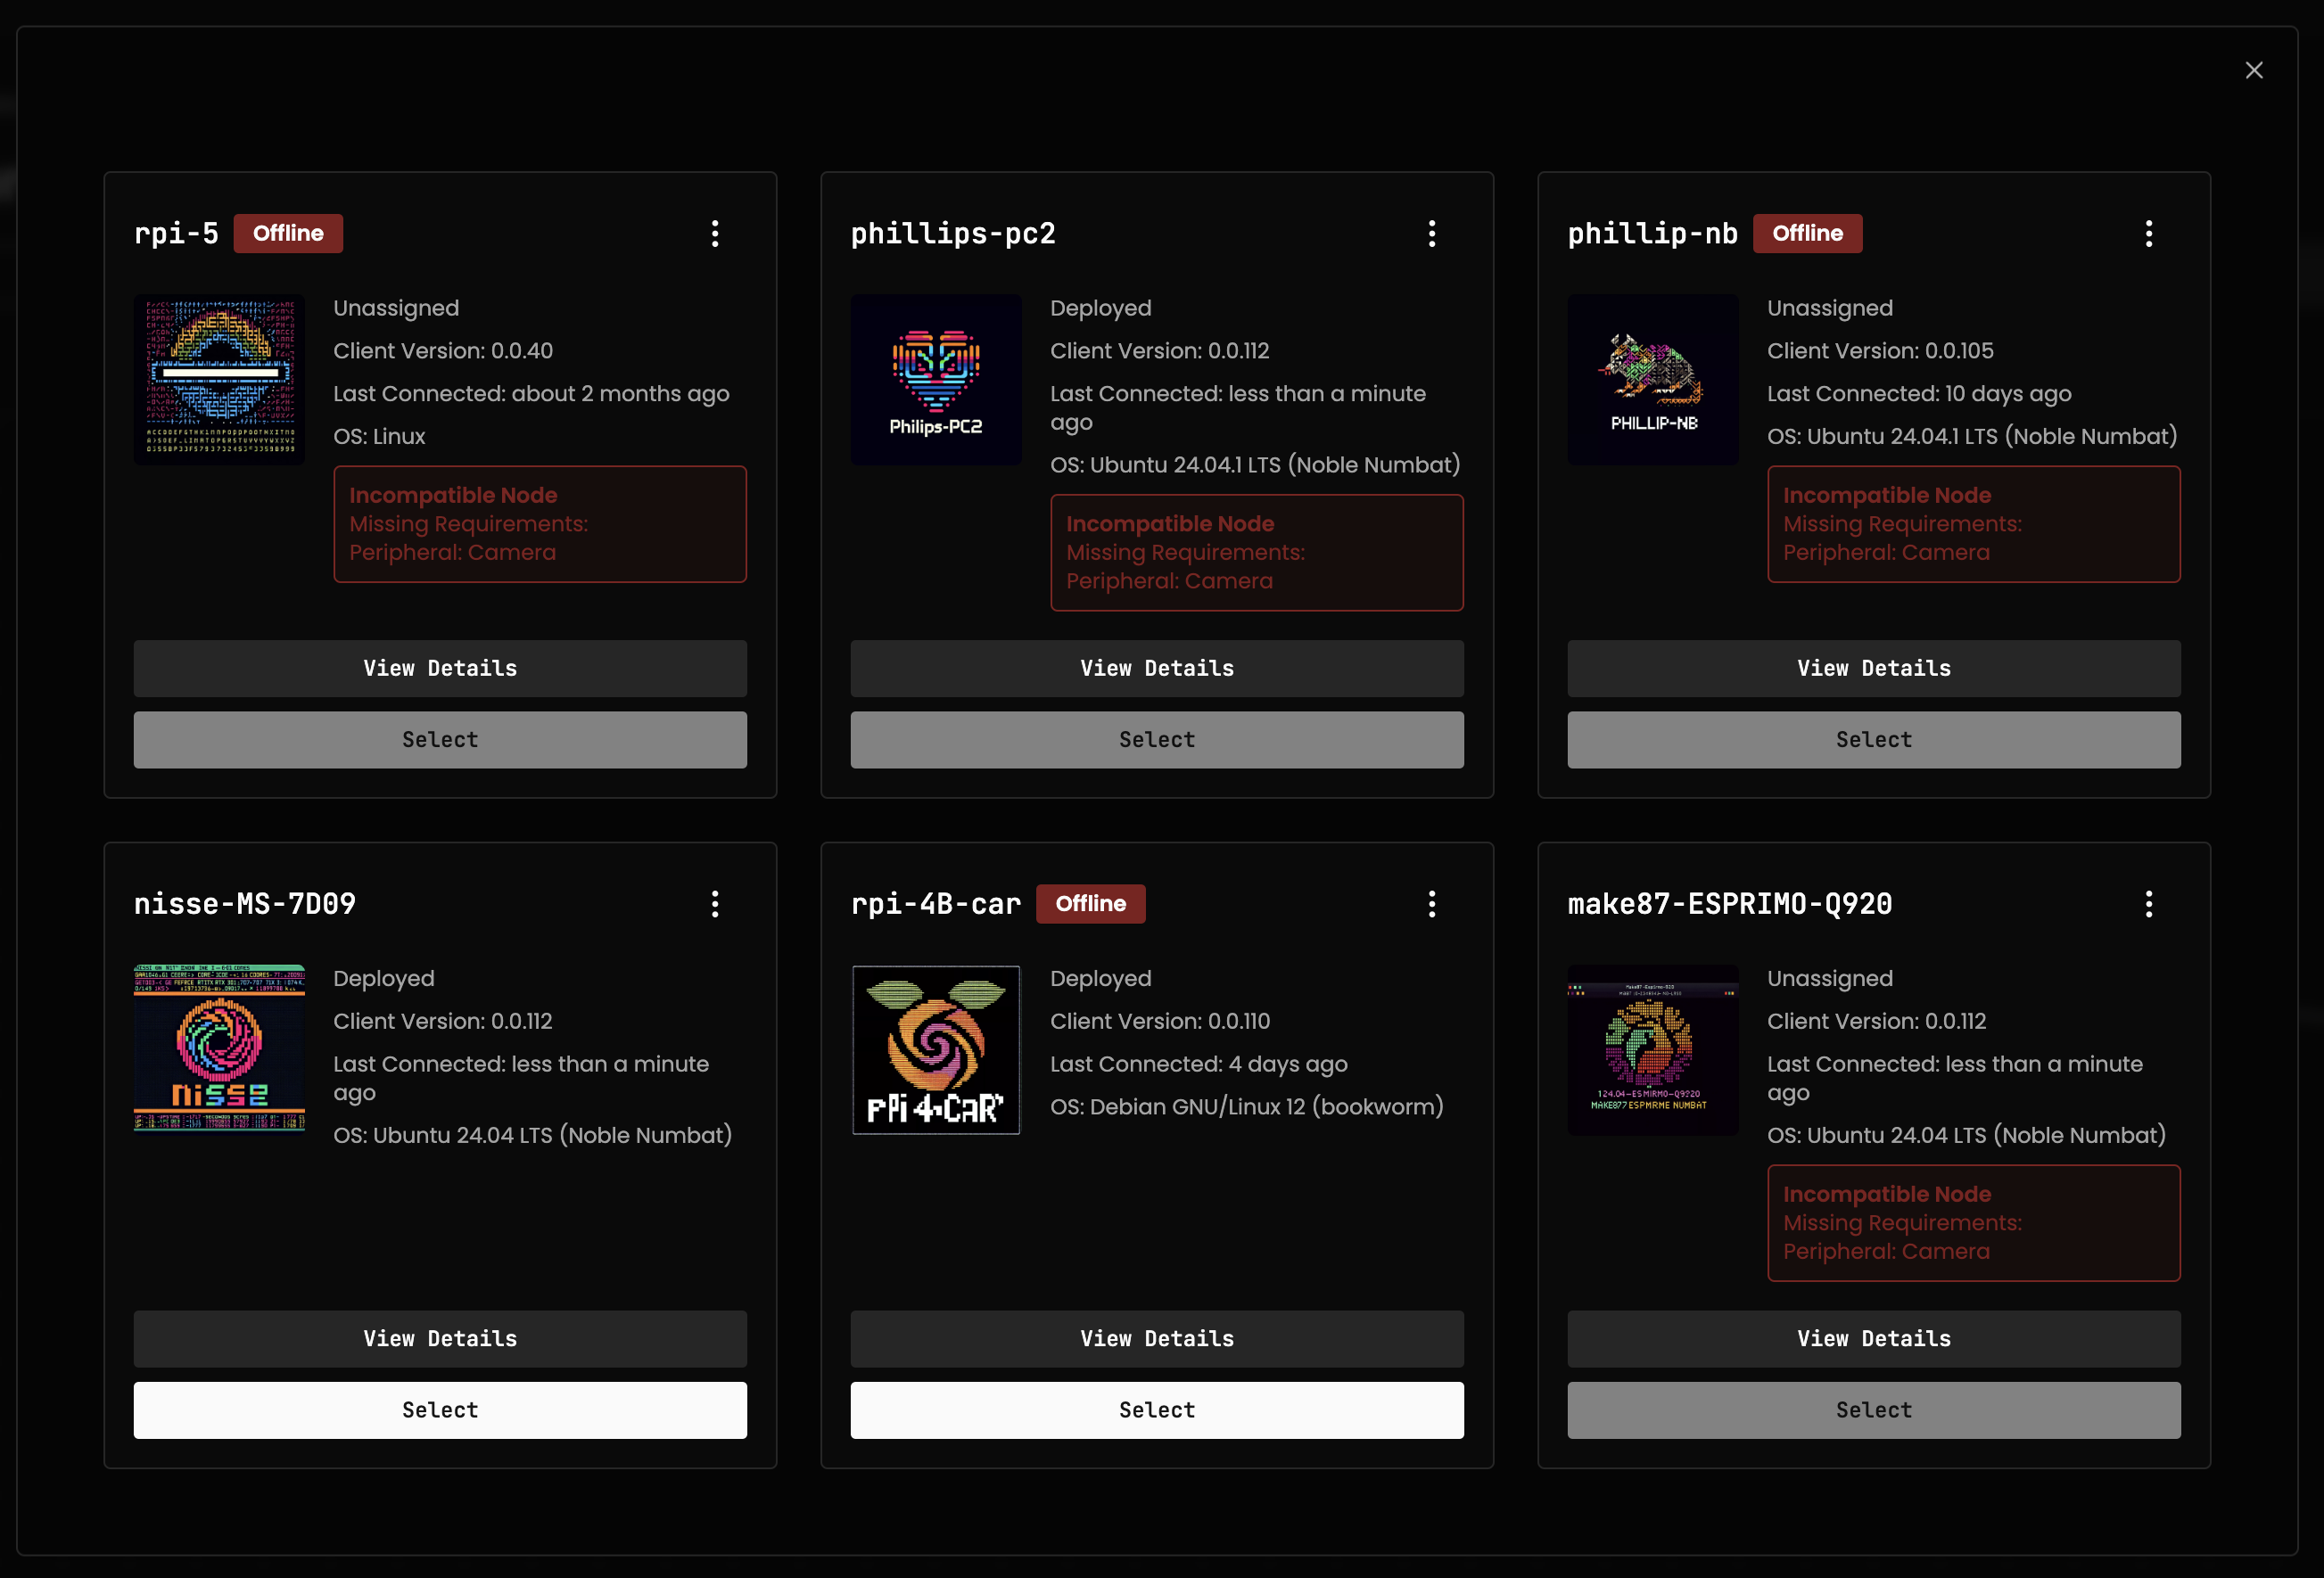
Peripheral Requirements
Some applications require specific peripherals to function. These requirements are defined in the MAKE87.yml manifest.
When deploying an application:
- The platform automatically checks if a node has the required peripherals.
- If a node lacks the necessary hardware, it will be marked as unavailable for selection.
- Users will be prompted to choose a compatible peripheral when deploying the application.
Read more about Peripheral Requirements and how to configure them for your application. For detailed information about peripheral discovery, see the Peripheral Discovery page.
Example: Discovered Peripherals
Example: Peripheral Requirement Validation
Build Kits
Build Kits are make87's term for pre-configured Dockerfiles and build steps that we offer for common languages and use cases. Build Kits ensure that applications are compiled and deployed consistently across different nodes and architectures.
How Build Kits Work
- Each application specifies build configuration in its
MAKE87.ymlmanifest. - Build Kits provide ready-to-use Docker build targets for popular languages and frameworks.
- You can use official Build Kits or define your own custom Docker build operations.
Official Build Kits
make87 provides the following supported Build Kits:
| Build Kit | OS | Architectures | Libraries / Runtimes |
|---|---|---|---|
python3 |
Debian Bookworm | amd64, arm641 | Python 3.11 |
python3_cuda |
Ubuntu 22.04 | amd64, arm64 | CUDA 12.4, Python 3.10 |
rust |
Debian Bookworm | amd64, arm64 | Rust 1 (latest, build) |
rust_cuda |
Debian Bookworm | amd64, arm64 | Rust 1 (stable, build) |
rust_av |
Debian Slim | amd64, arm64 | Rust 1 (stable, build), FFmpeg 7.1 |
You can find all official Build Kits in the make87-build-kits GitHub repository
Custom Docker Build Operations
Beyond the official Build Kits, you have full flexibility to define your own Docker build operations. In your application manifest, you can specify any Docker bake target configuration, giving you complete control over the build process.
This means you can: - Use your own Dockerfiles - Define custom build arguments and contexts - Configure multi-stage builds - Set platform-specific build options - Specify custom build secrets and cache configurations
The manifest supports the full range of Docker bake target syntax. For complete details on available options and configuration, refer to the Docker Bake Target Reference in the official Docker documentation.
This approach allows you to include specific libraries, dependencies, or configurations tailored exactly to your application's needs while leveraging Docker's powerful build system.
Platform Infrastructure Services
make87 offers several infrastructure services that applications can leverage without additional setup:
Logging and Monitoring
- Docker-Native Logs: Applications write to
stdout/stderrand you can view them withdocker logsor directly in the dashboard. - Optional Log Shipping: Deploy the Vector application (or your own shipper) to forward logs to systems such as Grafana Loki or Rerun.
- Flexible Integrations: Use our ready-made Vector, Grafana/Loki, or Rerun apps—or connect any logging stack you prefer.
For more detail on these options, see the Observability page.
Data Persistence
- Managed Blob Storage: Built-in storage solution for application data (images, model files, etc.)
- Volume Persistence: Application data persists across container restarts and updates
Secrets Management
- Secure Vault: Encrypted storage for sensitive configurations and credentials
- Runtime Access: Secrets mounted as read-only files at
/run/make87/secrets/<name> - SDK Convenience: Helper methods for easy secret access in supported languages
These services eliminate the need to configure separate AWS S3, database instances, or secret management systems for most use cases.
-
also known as
x86_64andaarch64↩